
Thinking about recording a video interview? It might seem a bit daunting at first, but honestly, it’s totally doable. Whether you’re interviewing someone for your show or for a work project, getting it right makes a big difference. You don’t need a Hollywood studio to make it look and sound good. We’ll walk you through the whole process, from picking the right gear to making sure your final video is something you’re proud of. Let’s get you ready to record that professional video interview.
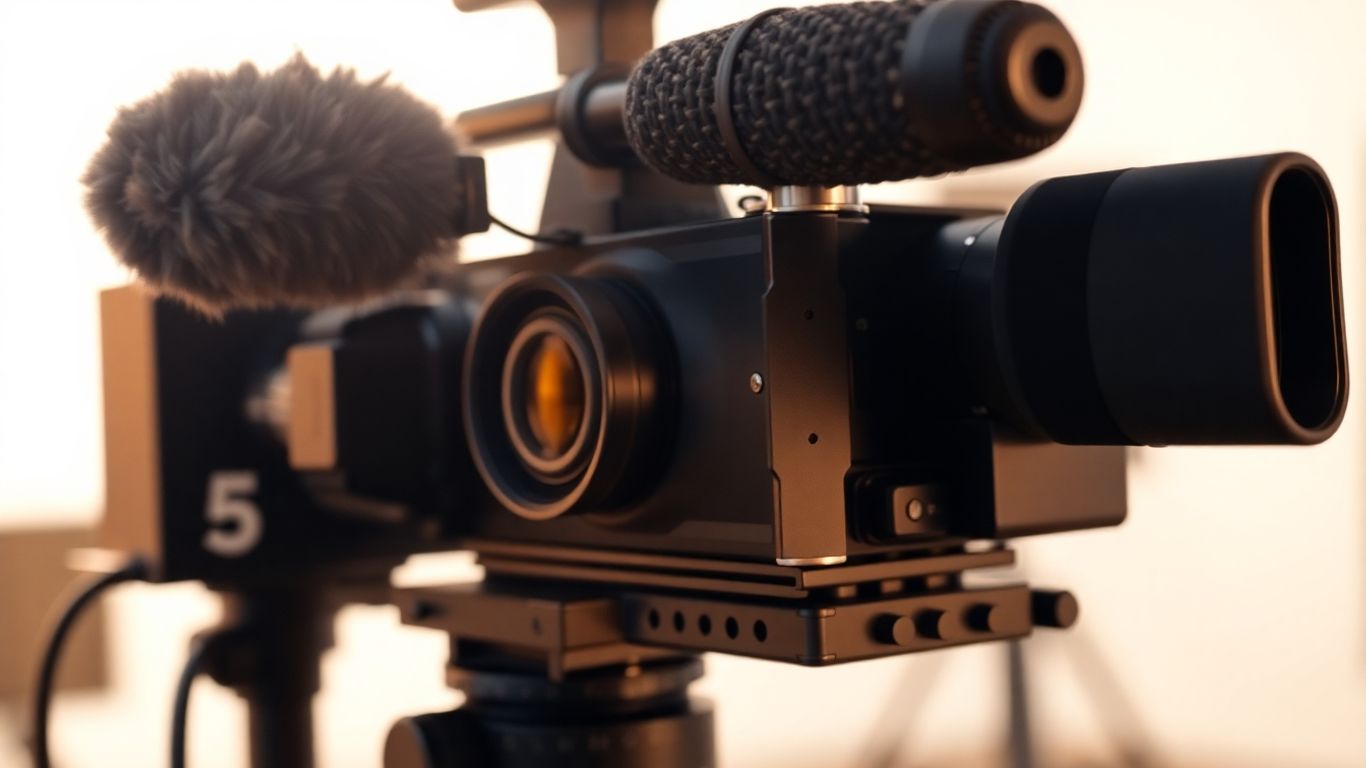
Alright, let’s talk about getting the right stuff to make your video interviews sound and look like you actually know what you’re doing. You don’t need to sell a kidney to get decent gear. Seriously. We’re going for that ‘effortlessly professional’ vibe, not ‘I spent my rent money on a microphone.’
Look, your voice is the star here. If people can’t hear you clearly, they’re going to click away faster than you can say ‘technical difficulties.’ You don’t need a fancy studio mic, but that tinny sound from your laptop’s built-in mic? Yeah, that’s a hard pass.
The takeaway? Get a dedicated microphone. Your ears will thank you.
Now, let’s make sure you don’t look like you’re filming a hostage video. Your webcam might work in a pinch, but let’s be real, it’s probably not winning any awards.
Whatever you choose, make sure it’s stable. Shaky footage is the quickest way to lose viewers. And please, for the love of all that is holy, make sure it’s recording in landscape mode (sideways).
This is the brain of the operation. You’ll need it to run your recording software, manage your files, and maybe even keep a cheat sheet of your questions handy (we won’t tell).
Remember, the goal here is to get clear audio and decent video without spending a fortune. Focus on the essentials, and you’ll be surprised at how professional you can sound and look.
Alright, so you’ve got your gear sorted, looking sharp and ready to roll. But how do you actually capture all this awesomeness? That’s where your recording software comes in. Think of it as the director of your little movie production, telling everyone where to point their cameras and making sure the sound guy (that’s you!) is doing their job.
Let’s be real, the internet can be as reliable as a chocolate teapot sometimes. One minute you’re having a smooth conversation, the next it’s buffering like it’s training for a marathon. To avoid your interview turning into a pixelated mess or a garbled audio disaster, you need software that records locally. This means the recording happens on each person’s device, not over the internet. It’s like having a backup plan built right in. This way, even if your Wi-Fi decides to take a nap, your precious interview footage is safe and sound on your computer or phone. It’s a game-changer for keeping that quality high, no matter how wonky the connection gets. You can find platforms that offer this, like Riverside.fm, which is designed with this exact problem in mind.
Imagine trying to edit a song where all the instruments are mashed into one single audio file. Nightmare, right? The same applies to video interviews. Multitrack recording is your best friend here. It means that each person’s audio and video is recorded on its own separate track. Why is this so great? Because when it comes time to edit, you have complete control. You can adjust the volume of one person without affecting the other, cut out a cough from one side without messing up the other’s dialogue, or even swap out audio if one track is better than another. It makes the post-production process so much smoother, saving you a ton of headaches and making your final product sound and look way more professional.
Your guests aren’t necessarily tech wizards. They might be nervous, they might be busy, and they definitely don’t want to spend twenty minutes figuring out how to join a call or adjust their settings. The best recording software is intuitive and easy for everyone to use. Look for platforms that have a straightforward guest workflow. This usually means they can join from their browser without downloading anything, or with a simple app. A good system will guide them through checking their audio and video, and hitting record should be as simple as clicking a big, friendly button. Less tech stress for them means a more relaxed interview for you, and ultimately, better footage for your audience.
Alright, so you’ve got your gear sorted and your software picked out. Now, before you even think about hitting record, you gotta do your homework. Seriously, winging it is a one-way ticket to an interview that feels like a root canal. You wouldn’t show up to a fancy dinner party in sweatpants, right? Same deal here. You need to know who you’re talking to.
Spend some quality time online. Stalk their website (in a professional way, of course). Check out their social media. Read any recent press releases. What are they all about? What are their goals? What have they been up to lately? The more you know, the better you can tailor your questions and make your guest feel like you actually care about what they have to say. It shows respect, and honestly, it makes you look way smarter.
Once you’ve got the lowdown on your guest, it’s time to whip up some questions. Think of yourself as a detective, but instead of solving crimes, you’re uncovering awesome insights. Don’t just jot down the first things that pop into your head. Plan them out. You want questions that are open-ended, the kind that can’t be answered with a simple ‘yes’ or ‘no’.
Here’s a little something to get you started:
Remember to keep a list handy, but don’t be afraid to go off-script if the conversation takes an interesting turn. Sometimes the best stuff happens when you least expect it.
This is where things can get a little… fiddly. Scheduling interviews can feel like herding cats, especially if you’re dealing with multiple people or different time zones. Get a clear date and time locked down, and send out a confirmation. Seriously, a simple confirmation email can save you a ton of headaches later. It makes you look organized and gives your guest a gentle reminder.
And hey, if you’re sending out any equipment or materials beforehand – like a script outline or even a little thank-you gift (swag!) – make sure you factor in shipping time. You don’t want your guest fumbling with a new microphone for the first time during the interview. Give them enough lead time to get comfortable with whatever you’re sending. It’s all about making the process as smooth as possible for everyone involved.
Alright, you’ve got your gear, you’ve picked your software, and you’ve prepped your guest like a pro. Now comes the part where you actually hit record. Don’t panic! It’s not rocket science, but there are a few things you can do to make sure your video doesn’t look like it was filmed on a potato in a wind tunnel.
First things first, let’s talk about what’s behind your guest (or you, if you’re the one being interviewed). A messy background is like wearing a clown nose to a job interview – it’s distracting and unprofessional. You want something clean and simple. Think a plain wall, a bookshelf that’s actually organized (no judging!), or maybe a subtle piece of art. If you’re feeling fancy and have some branding, you could even pop your logo or some branded items in the background. Just avoid anything that screams ‘I haven’t cleaned my room in a decade’. A cluttered background can seriously pull focus from the actual interview.
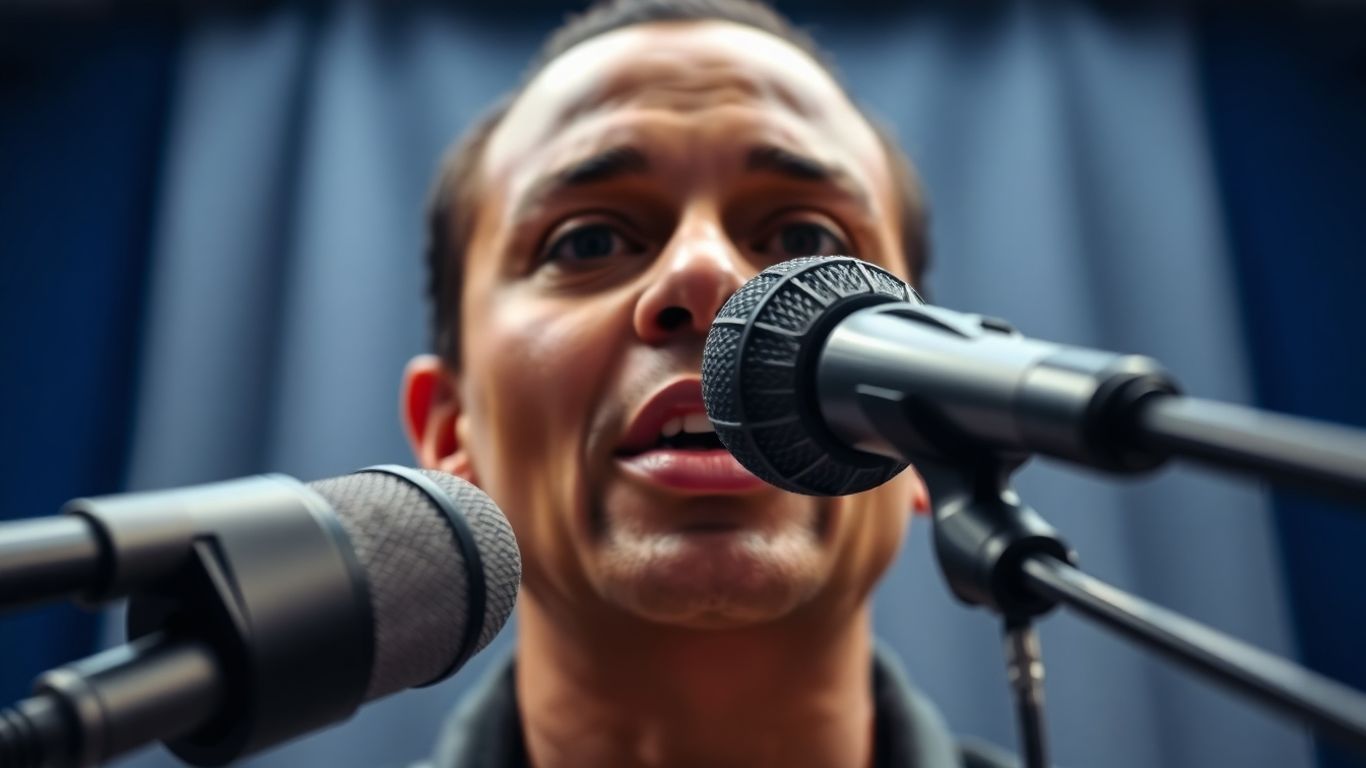
Bad lighting is the arch-nemesis of good video. Seriously, it can make even the most charismatic person look like they’re hiding from the law. The easiest win here is natural light. Position your guest (or yourself) facing a window. Avoid having the window directly behind them, though, unless you want a silhouette effect worthy of a spooky movie. If natural light isn’t cooperating, you might need to get a little creative with lamps. The classic three-point lighting system is your best friend here, but even just one good lamp placed in front and slightly above can make a world of difference. You want your guest’s face to be well-lit, not looking like they’re auditioning for a role as a mole person.
This one’s a biggie. Nothing kills an interview faster than a random dog barking, a siren wailing, or your roommate practicing their opera scales in the next room. Before you hit record, do a sweep of your environment. Close windows, turn off noisy appliances, and maybe even put up a polite ‘Do Not Disturb’ sign. It’s also a good idea to remind your guest to find a quiet spot too. You want the focus to be on the conversation, not on the cacophony happening around you. A little bit of prep work here can save you a lot of headaches in post-production when you’re trying to edit out unwanted noise.
Let’s be real: staring into a webcam while feeling your sweat glands wake up is nobody’s idea of a party. But, with a few tweaks to your approach, you’ll look (and sound) like you actually do this for a living. On-camera confidence is about more than just hiding your nerves — it’s about showing viewers the best version of you.
First things first: don’t slouch. Slumping screams, “I’d rather be watching TV.” Instead, roll those shoulders back and sit like you’re meeting your childhood hero. Tall posture sets off some kind of magic brain thing — you feel bolder, and you come across more credible. Here’s what to remember:
It’s wild how much better you connect when your body language screams “I’m here! I’m listening!” instead of “I’m trying not to fall asleep.”
Time to befriend your camera lens. It feels weird, but it’s necessary. People watching will feel like you’re really talking to them if you look at the lens, not the person’s face on your screen. It’s not easy at first, but here’s how to fake it till you make it:
Genuine eye contact builds trust. You absolutely want your viewers to feel like you’re speaking directly to them, even if you’re secretly reading from a sticky note off to the side.
The art of not boring your viewers — or rushing through like you’ve got a pizza in the oven. It’s easy to get nervous and blast through everything, but pacing goes a long way:
Here’s a simple table to guide your tempo:
|
Segment |
Ideal Pace |
Notes |
|---|---|---|
| Intro & Greeting | Medium-slow | Friendly, inviting |
| Questions/Answers | Medium | Clear, no rush, think-aloud moments |
| Key Takeaways | Slow | Pause for effect, let info sink in |
| Wrap-up | Medium-fast | End upbeat, keep energy up |
Find your rhythm and stick with it. You want to be the podcast host people actually want to watch (think of the fun chatter on top cybersecurity podcasts).
You can build on-camera confidence, but it takes a little practice and some nerve-wrangling hacks. Before you know it, you’ll be breezing through interviews and maybe even enjoying yourself. Okay, maybe.
Alright, you’ve wrangled your guest, set up your gear, and hit record. High fives all around! But hold on, the party’s not quite over. You’ve got all this raw footage, and while it might be gold, it’s probably not ready for prime time just yet. Think of post-production as the spa day for your interview – it needs a little pampering to look its best.
This is where the magic really happens, or at least where you make it look like it did. You’ve got hours of footage, and let’s be honest, most of it is probably just… filler. Your job now is to trim the fat and serve up the juicy bits. This means cutting out those awkward pauses where you both forgot what you were talking about, any “ums” and “ahs” that make your guest sound like they’re chewing gravel, and any tangents that went way off the rails.
Remember, the goal isn’t to make your interview unrecognizable, but to make it as engaging and easy to watch as possible. If you recorded with separate tracks (which you totally should have!), editing becomes way less of a headache. You can tweak audio levels independently, which is a lifesaver.
So, you’ve chopped, diced, and polished your video until it shines. Now what? You can’t just let it sit on your hard drive, gathering digital dust! It’s time to unleash it upon the world.
Don’t be shy about promoting your work. You put in the effort, so make sure people see it. Think of it as sending your video out into the world with a little party hat and a megaphone.
Once your podcast is all put together, it’s time for the final touches! Think of it like cleaning up your room after a big party. We’ll make sure everything sounds super clear and professional.
So, you’ve wrestled with microphones, stared down cameras, and maybe even convinced your cat to stop walking across the keyboard during recording. High five! You’ve officially gone through the whole song and dance of making a video interview. Remember, it’s not about being perfect, it’s about getting your message out there. Plus, think of all the funny bloopers you probably captured – those are gold for your blooper reel later. Now go forth and share your awesome interview with the world. And hey, if you liked this, maybe check out our show? Just sayin’.
To get the best quality recordings, even with a shaky internet connection, you should use software that records everyone’s video and audio straight to their own device. This way, your internet speed doesn’t mess up the final recording. Think of it like everyone recording their own part of the movie separately before putting it all together.
A good microphone is super important for clear sound! For recording at home or in a quiet spot, a USB mic like the Blue Yeti works well. If you’re on the go, a smaller mic that attaches to your camera or phone, like the Rode VideoMicro II, is a great choice. Using headphones can also help you hear yourself better and avoid background noise.
You don’t need fancy equipment to start! A good webcam on your computer can work just fine. If you have a smartphone with a decent camera, that’s another great option. For even better quality, you could consider using a DSLR camera if you have one.
You want your background to be neat and not distracting. A simple, clean wall is often best. You could also add a bookshelf or a plant. If you have a logo or some branded items, you can include those too, but keep it from looking too busy.
Before the interview, do your homework on the person you’re interviewing. Learn about their background and what they do. This helps you ask better questions and makes the conversation more interesting for your viewers. Also, plan out your questions ahead of time, but be ready to go with the flow if the conversation takes an interesting turn.
After you finish recording, you’ll likely have a lot of footage. You’ll need to edit it to cut out any mistakes, long pauses, or parts that aren’t interesting. This is where you polish your video to make it shine. If you have multiple people interviewed, you’ll need to put their separate recordings together smoothly.
