
So, you’re looking to record a podcast remotely, huh? It happens. Maybe your guest is across the country, or even across the globe. Whatever the reason, you don’t have to settle for bad audio. It might seem a bit tricky at first, but with the right approach, you can get sound that’s pretty darn close to being in the same room. We’ll walk you through the basics of how to record a podcast remotely, from the gear you’ll need to the software that makes it all happen.
Look, we all love the idea of sitting across from our podcast guests, sharing a cup of coffee, and soaking in the same studio vibes. It’s just… easier, right? You’re not wrestling with dodgy internet connections or explaining what a pop filter is for the tenth time. Plus, there’s something about being in the same room that just clicks for those deep, flowing conversations. But let’s be real, sometimes life (or, you know, geography) gets in the way.
So, your dream guest is living it up in another country, or maybe your co-host decided to move to a different continent. Bummer. Or perhaps you’re just starting out and don’t have the budget to fly everyone to your makeshift studio (aka, your spare bedroom). Whatever the reason, you can’t always be in the same room. This is where remote recording becomes your new best friend. It’s not just a backup plan; it’s often the only plan if you want to connect with people beyond your immediate vicinity.
Beyond the obvious necessity, recording remotely actually opens up a world of possibilities. You can chat with experts from anywhere, snag interviews with people who’d never make it to your town, and even build a global audience without leaving your desk. Think of it as a superpower: you can talk to anyone, anywhere. Plus, you can even record video alongside your audio, giving your podcast a whole new dimension. It’s a fantastic way to expand your reach and bring diverse voices to your show. You can find some great remote recording platforms to help you out with this.
Honestly, the thought of remote recording might sound intimidating, like you need a degree in audio engineering. But it’s really not that complicated. With the right gear and a little know-how, you can make your remote recordings sound just as good, if not better, than an in-person session. We’re talking about simple steps like using headphones (so you don’t get that echoey mess), finding a quiet spot, and maybe even doing a quick tech check with your guest beforehand. It’s all about making sure the audio is clean and clear, so your listeners can focus on what you’re saying, not on the background noise. It’s about making sure your audio is pristine.
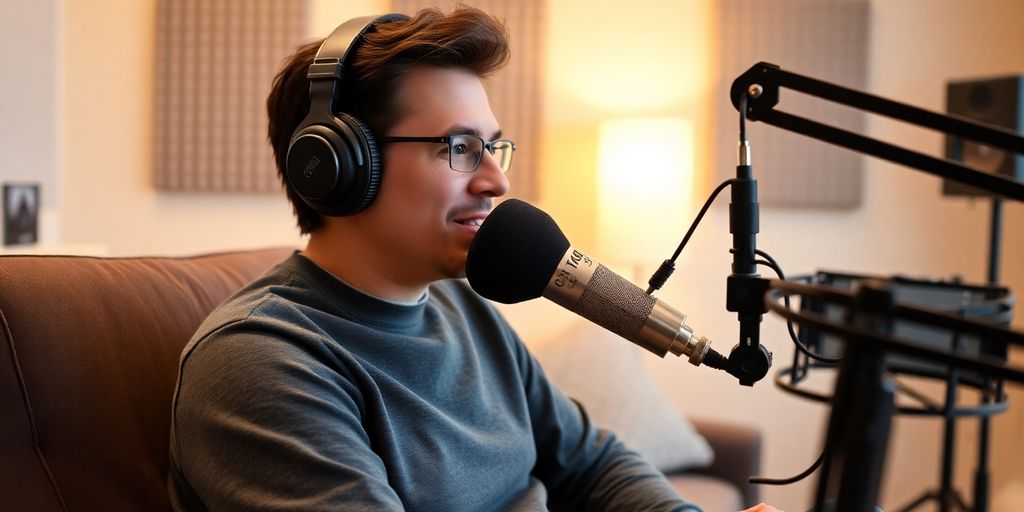
Alright, let’s talk about the gear. You wouldn’t show up to a fancy dinner in your pajamas, right? Same idea here. While your built-in laptop mic might seem okay, trust me, it’s the audio equivalent of wearing pajamas to that fancy dinner. We need to level up.
Forget the built-in mic on your computer or those earbuds that came with your phone. They’re just not going to cut it for anything beyond a casual chat. You need a dedicated microphone. For remote recording, dynamic microphones are usually your best bet. Why? Because they’re less sensitive to background noise. Think of them as having selective hearing – they focus on your voice, not the dog barking next door or the hum of your fridge. USB mics are super easy to use; you just plug them in, and you’re pretty much good to go. Some solid, beginner-friendly options include the Samson Q2U or the Audio-Technica ATR2100x-USB. They’re workhorses that won’t break the bank.
A quick word of caution: steer clear of the Blue Yeti. While popular, it’s a condenser mic that picks up everything, making it a nightmare in less-than-perfect recording environments.
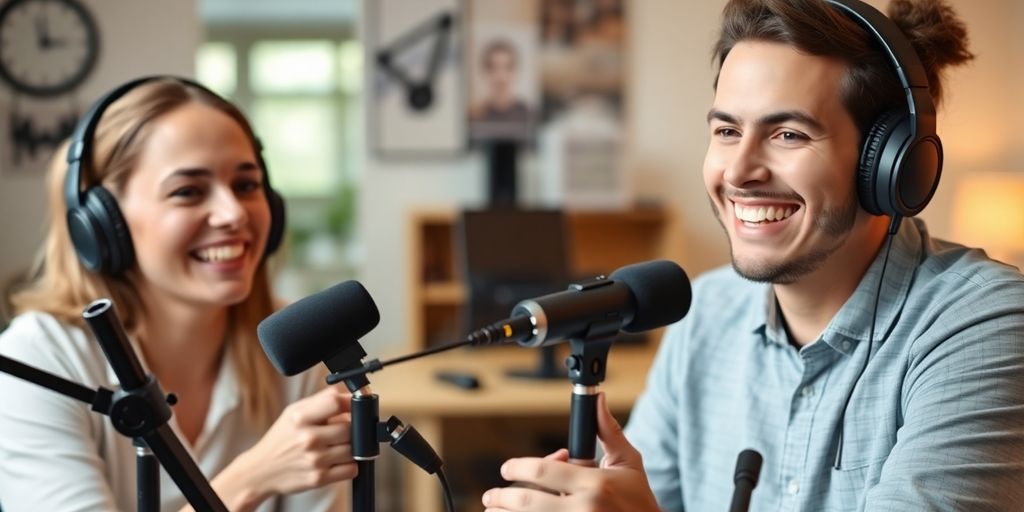
This one’s non-negotiable. You must wear headphones. Not just any headphones, though. Over-ear headphones are ideal because they create a seal around your ears, blocking out external noise and preventing your mic from picking up the sound coming from your speakers (that’s called feedback, and it’s the enemy of good audio). Earbuds can work in a pinch, but they often let in more ambient sound. Wearing headphones means you can hear yourself and your guest clearly, and you’ll be more aware of any audio issues as they happen.
Ever heard those harsh “P” and “B” sounds that sound like a tiny explosion right into the microphone? Those are called plosives, and they’re caused by bursts of air hitting the mic. A pop filter is a simple, inexpensive mesh screen that attaches to your mic stand and sits between you and the microphone. It diffuses that puff of air, smoothing out those harsh sounds. It’s a small addition that makes a huge difference in making your audio sound polished and professional. Seriously, don’t skip this.
Alright, let’s talk about setting up your recording space, or more importantly, your guest’s recording space. Think of it as building a little audio sanctuary. You want to minimize all the junk sounds that can sneak into your recording. We’re talking about echoes, traffic noise, your neighbor’s dog deciding it’s time to serenade the world – all that stuff.
First things first, your internet connection is basically the highway your audio travels on. If it’s a bumpy, slow highway, your audio is going to sound like it’s stuck in rush hour traffic. Make sure you and your guest have a stable connection. Wired Ethernet is usually way better than Wi-Fi if you can swing it. It’s like trading a scooter for a sports car – much more reliable.
This is where you tell your guest to find the quietest spot possible. Forget the kitchen with the humming fridge or the living room with the TV blaring. Bedrooms are often surprisingly good because they usually have carpets, curtains, and beds – all soft things that eat up sound. Even a walk-in closet filled with clothes can work wonders! The goal is to create a space that doesn’t bounce sound around like a pinball machine.
So, what if your guest’s room sounds like a drum solo? You can suggest some easy fixes. Think soft things! Blankets, pillows, even a mattress leaned against a wall can make a huge difference.
Here are a few quick tips to suggest:
Remember, the less hard, flat surfaces your sound waves hit, the better. It’s all about absorbing that sound before it can bounce back and mess up your recording.
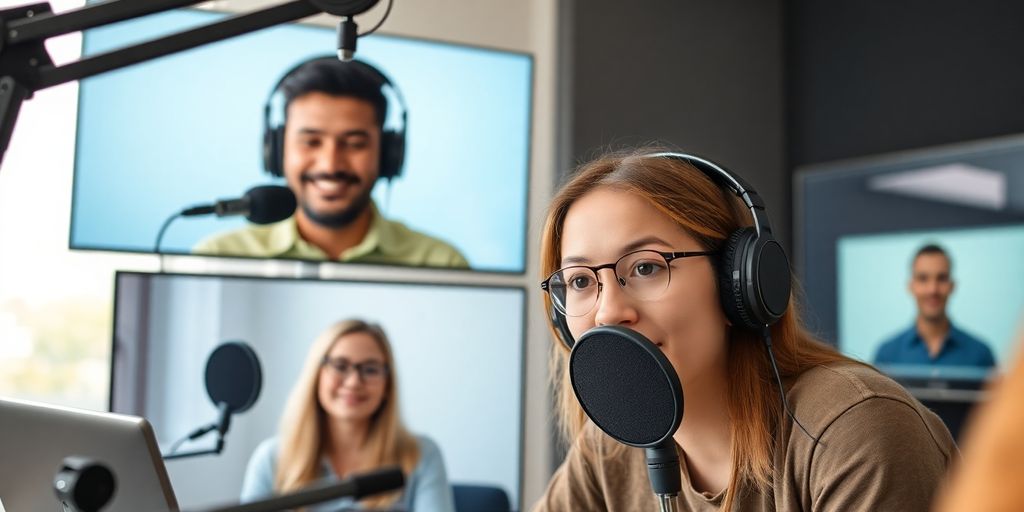
Alright, let’s talk about the digital tools that’ll make your remote podcast sound like you’re all in the same room, or at least in the same zip code. Picking the right software is like choosing your co-pilot for this remote recording adventure. You’ve got a few main players, each with their own quirks and superpowers.
Zoom is probably what you’ve used for everything from work meetings to virtual happy hours. It’s super accessible and, hey, it’s free for basic use. But here’s the catch: Zoom records a single audio file for everyone on the call. This means if one person’s internet connection hiccups, it can mess with everyone’s audio. Plus, it compresses the audio, which isn’t ideal for that crisp, professional sound you’re aiming for. Think of it as the casual chat option – fine for catching up, but maybe not for your magnum opus.
These guys are the heavy hitters for remote podcasting. Both Riverside.fm and SquadCast record each participant’s audio locally. What does that mean for you? It means that even if the internet gods are not smiling upon your guest, their audio is captured in high quality right on their own computer. Then, after the call, these files are uploaded. This local recording is a game-changer because it bypasses the internet’s shakiness and gives you separate tracks to play with in editing. It’s like having a mini recording studio for each guest. They also often offer video recording, so you can capture those facial expressions too, making the conversation feel more natural.
These platforms usually come with a monthly fee, but for the quality and reliability they offer, it’s often worth the investment.
This is a more technical approach, but it’s essentially what Riverside and SquadCast do behind the scenes. A “double-ender” means each person records their own audio track locally. You can do this using software like Audacity (free!) or Adobe Audition, and then have your guests send you their files after the call.
Ultimately, the best software for you depends on your budget, your technical comfort level, and how much you value pristine audio versus ease of use for your guests. Don’t be afraid to try out free trials to see which one feels right!

Alright, so you’ve got your gear sorted and your recording space prepped. Now comes the part where you wrangle your guest into the same level of readiness. Think of yourself as a friendly, slightly bossy podcasting drill sergeant. Your mission? To make sure your guest sounds as good as you do, without them needing a degree in audio engineering.
Before you even hit record, give your guest a quick rundown of what not to do. It’s like a pre-flight checklist for audio quality.
Remember, your guest might not be a podcasting pro. A little guidance goes a long way in preventing those cringe-worthy audio mishaps that can ruin an otherwise great conversation.
This is where you become the tech support guru. A quick tech check can save you a world of pain later.
Keep it simple, folks. The easier it is for your guest, the better the outcome.
Alright, the moment of truth has arrived! You’ve prepped your guest, you’ve fiddled with the software, and now it’s time to actually capture that sweet, sweet audio. Don’t get all antsy on me now; this is where the magic happens, and it’s not as scary as it sounds. Think of it like this: you’ve done all the hard work, now you just need to press a few buttons and try not to spill your coffee.
This might seem obvious, but seriously, double-check that you’ve actually hit the record button. It’s happened to the best of us – you have a fantastic conversation, only to realize you were recording the silence before the intro. Most remote recording platforms will give you a visual cue, but it never hurts to confirm. A good habit is to have your guest also record their audio locally, even if it’s just on their phone’s voice memo app. This is your ultimate backup, your audio safety net. It’s never a bad idea to have a backup, even if it’s just to fill in the gaps. You can find some great entry-level recording kit for podcasters to help with this.
Keep an eye on those audio levels. You want them to be in the green, maybe tickling the yellow occasionally, but definitely not hitting the red. Red means clipping, and clipping sounds like a digital demon screaming in your listener’s ear. Resist the urge to check your notifications or scroll through memes. Focus on the conversation and the audio meters. If your guest sounds too quiet, politely ask them to speak up or adjust their mic. If they’re too loud, the same applies. It’s all about finding that sweet spot.
Remember, you’re not just recording audio; you’re having a conversation. Even though you’re miles apart, try to make it feel as natural as possible. Listen actively to your guest, ask follow-up questions, and don’t be afraid of a little silence. Sometimes, the best moments happen when you let the conversation breathe. If you’re using a platform like Riverside.fm or SquadCast, you’re already ahead of the game with their studio-in-a-box features. Just keep the conversation flowing, and let the technology do its thing in the background. The goal is to make your guest feel comfortable, which in turn makes for better audio.
Ever wondered how a great podcast episode comes to life? Our ‘Recording Day’ section dives into the fun and effort that goes into making each show. It’s where the magic really happens, from brainstorming ideas to hitting record. Want to see how we create our funny episodes about faith and culture? Visit our website to learn more about the process!
Alright, you’ve wrestled with the tech, wrangled your guests, and hopefully ended up with audio that doesn’t sound like it was recorded in a tin can during a hurricane. Remember, even if your guest is on the moon, you can still get some pretty decent sound. Just try not to rely on just one method – a backup is always a good idea, like having a spare pair of socks. If you’re still scratching your head, give Squadcast or Cleanfeed a whirl.
You can record a podcast remotely using a few different methods. Video chat apps like Zoom can work, but they might make your audio sound a bit fuzzy. For clearer sound, special software like Riverside.fm or SquadCast is better because they record each person’s voice separately and at a higher quality. Another way is to have each person record their own audio on their computer and then send the files to you to put together.
While Zoom is easy to use and free for shorter recordings, it can make your audio sound less clear because it squishes the sound files. For a more professional sound, using software like Riverside.fm or SquadCast is recommended. These tools record your audio locally, meaning they capture it directly on your computer before sending it, which keeps the sound quality much higher.
You can record a remote podcast for free by using video chat programs like Zoom. Just remember that free Zoom has a time limit of 40 minutes per recording. Another free option is to have everyone record their own audio on their computer and then share those files with you. This is often called a ‘double-ender’ setup.
To get the best sound when recording remotely, make sure your guest has a good internet connection, a quiet place to record, and is using a microphone (even a simple one is better than the computer’s built-in mic). Also, tell them to wear headphones so their voice doesn’t echo back into the recording. Checking all this before you start recording makes a big difference.
Using headphones or earbuds is super important when recording remotely. They stop your voice from being picked up by your guest’s microphone, which causes an echo or ‘bleed.’ It helps keep the audio clean for both of you.
Having a strong internet connection is key for smooth remote recordings. Try to minimize other things using your internet while you’re recording, like streaming videos or downloading large files. Also, picking a quiet room away from loud noises like traffic or air conditioners will really help improve your audio quality.
