So, you’re curious about how do you make a podcast on Canva? It might sound a bit unusual since Canva is mostly known for its design templates. But guess what? It’s actually a pretty neat tool for putting together a podcast, especially if you’re just starting out. You don’t need fancy software or a huge budget to get your voice out there. We’re going to walk through how you can use Canva for your podcasting journey, from making it look good to getting your audio ready for the world.
Alright, so you’ve got this brilliant idea for a podcast, maybe it’s about your cat’s questionable life choices, or perhaps you’re an expert on, I don’t know, artisanal cheese. Whatever it is, you’re thinking, “How on earth do I make this happen without needing a degree in audio engineering?” Well, my friend, let me introduce you to Canva. Yes, that Canva. The one you’ve been using to make birthday invitations that look suspiciously professional.
Seriously, Canva has quietly become a surprisingly capable tool for more than just pretty pictures. Think of it as your digital Swiss Army knife. It’s not just for whipping up eye-catching graphics anymore; it’s actually got some neat features that can help you get your podcast off the ground. It’s like finding out your favorite coffee shop also has a secret menu item that tastes like pure gold. You can use it to design your podcast cover, sure, but we’re going to explore how it can actually help you with the audio part too. It’s a game-changer for anyone who wants to sound good without breaking the bank or their sanity.
Remember when Canva was just for making those colorful flyers for your garage sale? Those days are long gone. The platform has evolved, adding features that make it a legitimate contender for basic audio production. It’s user-friendly, which is a huge plus when you’re just starting out and the thought of complex editing software makes you want to crawl under a rock. You can actually record and edit audio directly within Canva, which is pretty wild when you think about it. This means less jumping between different apps and more focus on creating content. It’s a fantastic way to get started with podcasting, especially if you’re looking for a simple way to get your voice out there.
So, you’re ready to ditch the idea that podcasting requires a soundproof studio and a degree in acoustics? Good. Because Canva is here to make things way less intimidating. We’re going to walk through how to use this surprisingly versatile tool to get your podcast from a mere idea in your head to something you can actually share with the world. It’s not going to be complicated, and you might even have some fun along the way. Ready to hit record? Let’s do this!
Here’s a quick rundown of what we’ll cover:
Don’t get bogged down by the technical stuff. Canva simplifies the process, allowing you to focus on what you do best: creating great content. It’s about making podcasting accessible, not intimidating. You can even record directly on your phone using apps like Spotify for Podcasters if you want to try that first. recording a podcast
Alright, let’s talk about making your podcast look as good as it sounds. Because let’s be real, nobody wants to hit play on something that looks like it was designed by a toddler with a crayon. Your podcast cover art is the first handshake you give to potential listeners. It needs to be good. Like, really good.
First things first, you need a template. Canva has a gazillion of them, and thankfully, they’ve got specific ones for podcast covers. Think of these as the pre-made pizza dough – you just add your own toppings. You want something that screams “This is my podcast, and you’re gonna love it!” without actually screaming. Look for templates that are clean, easy to read, and hint at what your show is all about. Don’t go for something super busy; remember, this thing will eventually be tiny on someone’s phone screen. We’re aiming for clarity, not a Where’s Waldo? situation.
Now for the fun part: making it yours. This is where you get to play artist. Canva makes it super easy to swap out colors, fonts, and images. Think about your podcast’s vibe. Is it serious and informative? Quirky and fun? Your artwork should reflect that. Don’t be afraid to experiment with different color palettes and font pairings. Just try not to go overboard. A good rule of thumb is to stick to two main fonts and a color scheme that makes sense. You can find tons of cool graphic elements in Canva’s library to add that extra flair. Remember, this is your chance to stand out in a crowded podcasting world.
So, you’ve got a template, you’ve tweaked it, but does it pop? Making your artwork grab attention is key. This means using high contrast colors and making sure your podcast title is super readable, even when it’s shrunk down to the size of a postage stamp. Most platforms require your artwork to be a square image, specifically 3000×3000 pixels, so make sure you’re designing with that in mind. Avoid using too many words – aim for four words or less. And please, for the love of all that is holy, don’t put a picture of a microphone or headphones on your cover art. We know it’s a podcast. Just show us what it’s about.
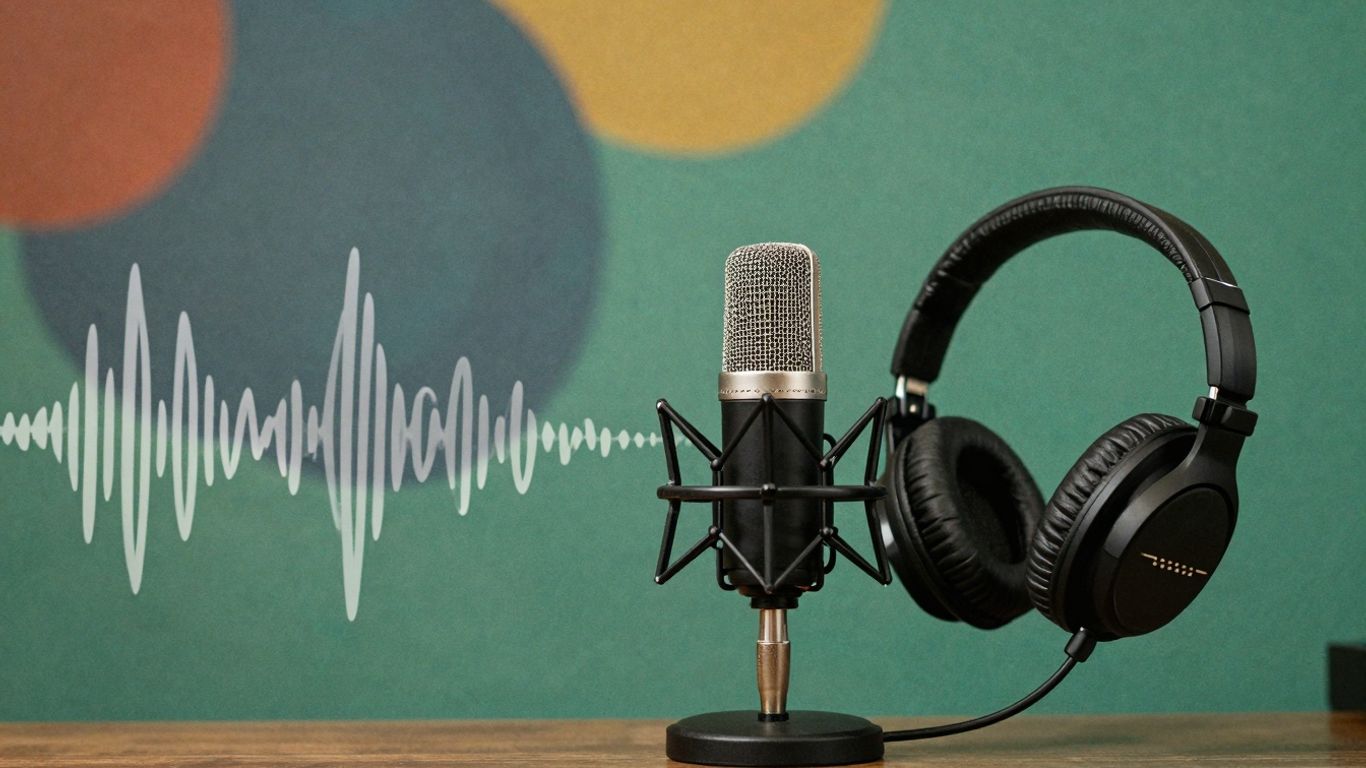
Alright, you’ve got your killer artwork sorted. Now it’s time to actually make some noise! Don’t sweat it, recording your podcast isn’t some mystical art form reserved for radio gods. With a little know-how, you can capture audio that sounds pretty darn good, even if your “studio” is currently your closet.
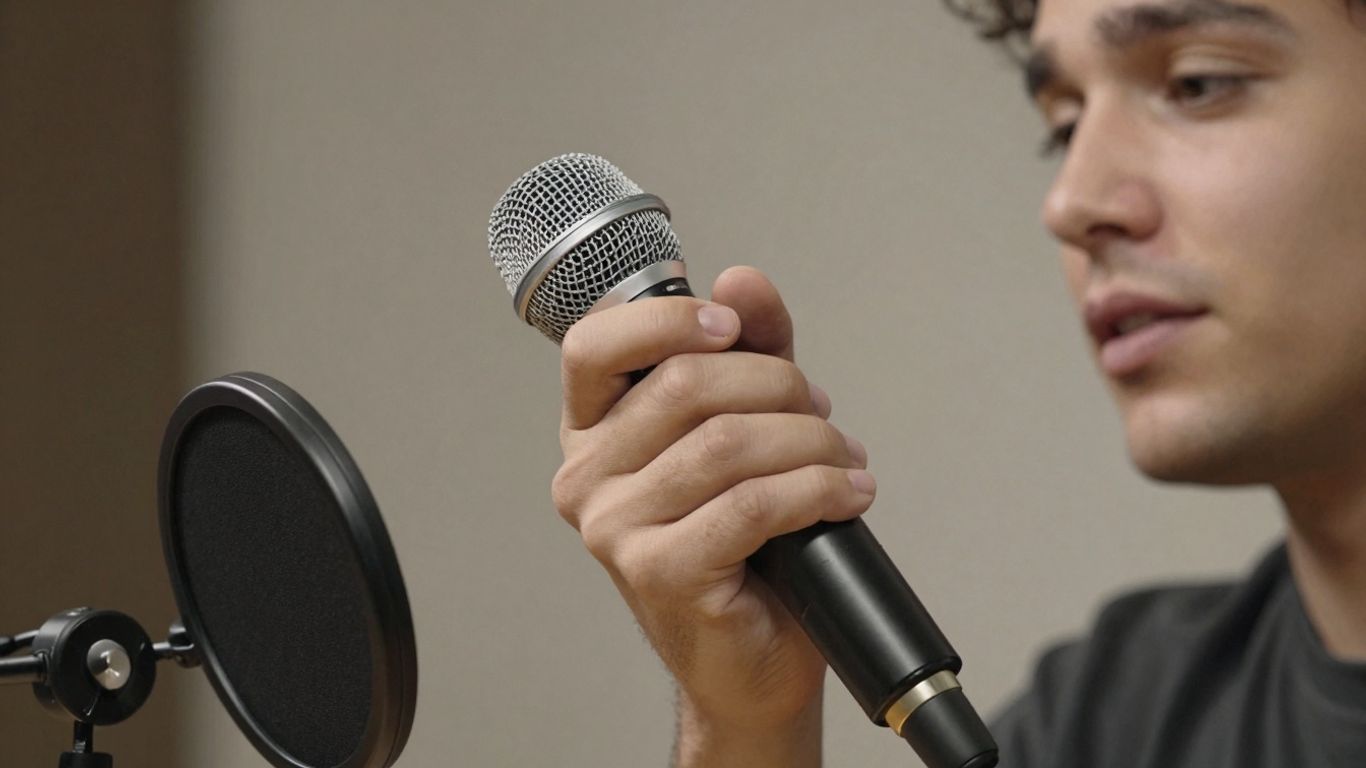
First things first, let’s talk mics. You don’t need to drop a fortune, but a decent microphone makes a world of difference. A USB mic is usually your best bet for starting out – they’re easy to plug in and get going. If you’re feeling fancy or have a co-host, you might need an audio interface, but let’s keep it simple for now. The goal is clear audio, not a symphony orchestra.
Here’s a quick rundown on mic placement:
Your recording space is more important than you think. Hard, flat surfaces are the enemy – they make your voice bounce around and sound echoey. Think about it: your bathroom sounds different from your living room, right? You want a space that’s a bit “dead,” meaning it absorbs sound.
If you’re serious about soundproofing, you can look into foam panels, but for now, just find the quietest, softest-sounding spot you can. You might even find that recording on your phone in a closet works better than your fancy computer mic in a bare room. It’s all about minimizing that background noise.
Canva’s built-in studio makes recording super simple. You can find the “Record Yourself” option in the “Uploads” section. It’s designed to be user-friendly, so don’t overthink it. You can switch to audio-only mode by selecting “No Camera” in the camera settings. When you’re ready, hit that big red record button. There’s a handy countdown, giving you a moment to collect your thoughts before you start talking. If you mess up, no biggie! You can edit it out later. Just focus on getting your message out there. If you want to record in segments, you can duplicate your page and record each part separately, which can make editing a breeze. You can even add royalty-free music and sound effects from Canva’s app section to give your podcast that professional polish. For more advanced recording, you might explore tools like Riverside.fm for better audio quality and features.
Alright, you’ve wrangled your audio into submission, and now it’s time for the magic trick: making it sound less like you recorded it in a tin can during a thunderstorm. Don’t sweat it; editing is just about cleaning up the bits that went sideways and making your podcast flow. Think of it like tidying up your living room after a party – you just want to make it presentable.
Nobody’s perfect, and your recording probably isn’t either. You might have coughed, sneezed, or said “um” more times than you care to admit. That’s where editing comes in. The goal here is to remove those little distractions that pull your listener out of the zone. You can chop out long pauses, awkward stumbles, or any background noise that sounds like a herd of elephants tap-dancing.
Editing is your chance to make your podcast sound professional without needing a sound engineer. It’s about making your message clear and easy to listen to.
Your intro and outro are super important. The intro is your handshake and your elevator pitch rolled into one. It tells people who you are, what the show is about, and why they should stick around. Your outro is your farewell and your call to action – tell people what to do next, whether it’s subscribing, visiting your website, or following you on social media.
Think of a punch list as your personal audio scavenger hunt. Instead of listening to the whole episode on repeat, make a list of specific things you want to fix. This could be “fix the loud ‘p’ sound at 3:15” or “remove the dog bark at 7:42.” This makes the editing process way more efficient.
Remember, the goal isn’t to make it sound like a Hollywood production (unless that’s your jam!), but to make it clear, enjoyable, and easy for your listeners to follow along. You’ve got this!
Alright, you’ve poured your heart and soul into creating this audio masterpiece. You’ve got the killer cover art, the perfectly edited audio, and you’re practically vibrating with excitement. Now what? It’s time to share your genius with the world! This is where the rubber meets the road, or rather, where your audio file meets the internet.
Before you can upload your glorious podcast, you need to get it into the right format. Think of it like packaging a fancy gift – you want it to look good and be ready for unwrapping. For podcasts, the go-to format is MP3. It’s like the comfy, reliable t-shirt of audio files: widely compatible and not too big. You’ll want to export your final audio from your editing software as an MP3. Aim for a bitrate of around 128 kbps for stereo or 64 kbps for mono; this gives you a good balance between sound quality and file size. Nobody wants to wait an eternity for a giant file to download, right?
So, you can’t just upload your MP3 file directly to Apple Podcasts or Spotify. Nope, you need a special kind of service called a podcast host. Think of it as your podcast’s digital home. These services store all your audio files and then generate an RSS feed, which is basically a special link that tells all the podcast directories (like Apple, Spotify, Google Podcasts, etc.) when you have a new episode. It’s pretty neat! There are tons of options out there, some free and some paid. Do a little digging to find one that fits your budget and needs. A good place to start looking is Buzzsprout.
Once your audio is uploaded to your host and you’re ready to launch, you’ll need to fill in some important details. This is your chance to hook potential listeners! Your podcast title should be catchy and clear. Your episode descriptions, often called show notes, are super important. They’re what people read to decide if they want to listen. Include a brief summary of the episode, any relevant links, and maybe even a transcript if you’re feeling fancy. Good show notes can seriously help people find your podcast through search engines.
Here’s a quick checklist for your episode details:
Remember, this is your first impression! Make it count. Think about what would make you click ‘play’ on a new show. Keep it simple, keep it clear, and don’t forget to have fun with it. After all, you made a podcast on Canva – you’ve already proven you’re awesome.
So, you’ve nailed your podcast cover art. Awesome! But Canva’s magic doesn’t stop there. Think of it as your podcast’s all-in-one visual studio. Need to whip up some snazzy show notes that actually make people want to read them? Canva’s got templates for that. You can create eye-catching graphics to share on social media, announce new episodes, or even tease upcoming guests. It’s like having a personal graphic designer on speed dial, but way cheaper (and less likely to steal your favorite stapler).
Let’s be honest, sometimes just listening isn’t enough. People like to see things. Canva lets you create all sorts of visual goodies to go along with your audio. We’re talking quote cards from your latest episode, audiograms (those little video clips with your audio waveform), or even simple promotional banners. This stuff is gold for getting the word out on platforms like Instagram or Twitter. You can even use Canva to generate short, cinematic videos with synchronized audio, dialogue, and music, which is pretty wild when you think about it. It’s a fantastic way to make your podcast more engaging and shareable. Check out Canva’s AI video generator for a taste of what’s possible.
Okay, this might sound a little dry, but trust me, grids and lines are your best friends when you’re trying to make your designs look professional and not like a toddler went wild with a crayon. Grids help you align everything perfectly, so your text isn’t wonky and your images aren’t all over the place. Lines can be used to separate sections in your show notes, add emphasis, or just give your design a bit of structure. Canva has tons of options for these, from simple straight lines to fancy dotted ones. Playing around with these elements can really make your podcast’s visual identity shine. It’s all about making things look clean and organized, which, let’s face it, makes your podcast seem way more put-together.
Want to make your podcast sound amazing? Canva has some cool tricks up its sleeve that can help. These tools are like secret weapons for anyone making a podcast. Ready to boost your show’s quality? Visit our website to learn more!
Alright, you’ve wrestled with Canva, probably stared at it a bit too long, and maybe even questioned your life choices. But hey, you did it! You’ve got a podcast. Or at least, you’ve got the cover art and the audio files ready to go. Now you just need to, you know, actually put it out there. Don’t overthink it. Just hit publish. If it’s a little rough around the edges, that’s okay. That’s how you learn. Plus, who knows, maybe your slightly-off-key intro music is exactly what someone needed to hear today. Go forth and podcast, you magnificent audio wizard!
Absolutely! While Canva is famous for design, it also has tools to record and edit audio. You can create your podcast cover art, record your voice, and even do some basic editing, all within Canva. It’s a super handy all-in-one tool, especially if you’re just starting out.
First, you’ll want to design what your podcast looks like! Search for ‘Podcast Covers’ in Canva. Pick a template that catches your eye and then make it your own by changing colors, adding text, and maybe even some cool graphics. This will be the first thing people see, so make it awesome!
Once you’ve got your design ready, look for the ‘Record yourself’ or ‘Upload media’ option. You can plug in a microphone and record directly into Canva. Just make sure you’re in a quiet spot so your recording sounds clear.
Canva’s editing tools are pretty straightforward, perfect for beginners. You can trim out mistakes, add intro and outro music, and adjust the sound levels. It’s not as fancy as professional audio software, but it gets the job done without being too complicated.
Canva helps you create the podcast, but you’ll need a separate place to store and share it. This is called a podcast host. Think of it like a website for your podcast. Services like Buzzsprout or Spotify for Podcasters will take your audio file and put it on platforms like Apple Podcasts and Spotify for everyone to hear.
Definitely! You can use Canva to create graphics for your social media posts about the podcast, design eye-catching show notes, or even make promotional images. It’s a versatile tool that can help you make your entire podcast brand look amazing.
