
Starting a podcast is exciting, and getting your audio sounding just right is a big part of that. You might be wondering what tools are out there to help you make your episodes shine. We’ve put together a list of some great podcast editing software for beginners to help you get started. You don’t need to be a tech wizard to make your podcast sound professional. Let’s explore some options that make the editing process easier for you.
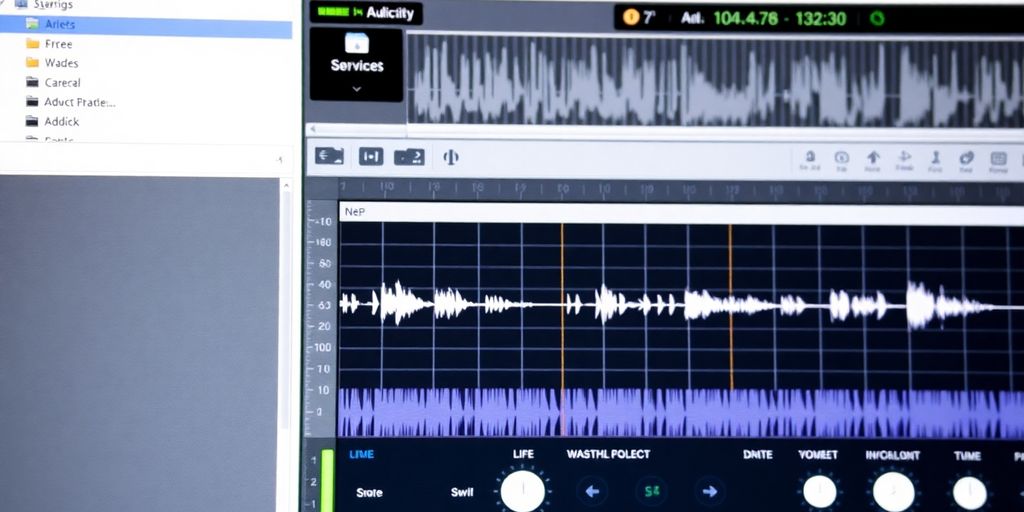
Alright, let’s talk about Audacity. If you’re just dipping your toes into the podcasting pool and don’t want to shell out any cash, this is your go-to. Seriously, it’s free. Like, completely, utterly, wonderfully free. It’s been around forever, and it’s got this almost legendary status among audio folks. Think of it as the trusty old bicycle of podcast editing software – maybe not the flashiest, but it gets the job done, and you can’t beat the price.
So, what can you actually do with this freebie? A whole lot, actually. You can edit multiple audio tracks, which is pretty neat if you’ve got interviews or different sound effects going on. It’s got a bunch of effects built-in, and you can even add more from third-party plugins. The cool thing is, the editing is now non-destructive, meaning you can mess around with effects and then decide you don’t like them without permanently ruining your audio. It’s like having a magic eraser for your sound files.
Here’s the thing: while Audacity is free and powerful, it can look a bit intimidating at first. The interface is way better than it used to be, but it still has a bit of a “retro” vibe that might make you scratch your head. It’s definitely got a learning curve, but there are tons of free tutorials out there to help you figure it out. If you’re willing to invest a little time, you’ll be editing like a pro in no time.
Don’t let the slightly dated look fool you. Audacity is a powerhouse for basic podcast editing. It might take a bit of effort to learn, but the payoff is huge, especially when you consider it costs absolutely nothing. Plus, getting your podcast cover art just right is important too, and there are tools to help with that.
Audacity also supports batch processing, which is a lifesaver if you have a bunch of episodes to clean up. You can even get pretty high-quality audio out of it, up to 32-bit/384kHz. It’s not the fanciest tool on the block, but for getting started and making your podcast sound good without spending a dime, you really can’t go wrong with Audacity.
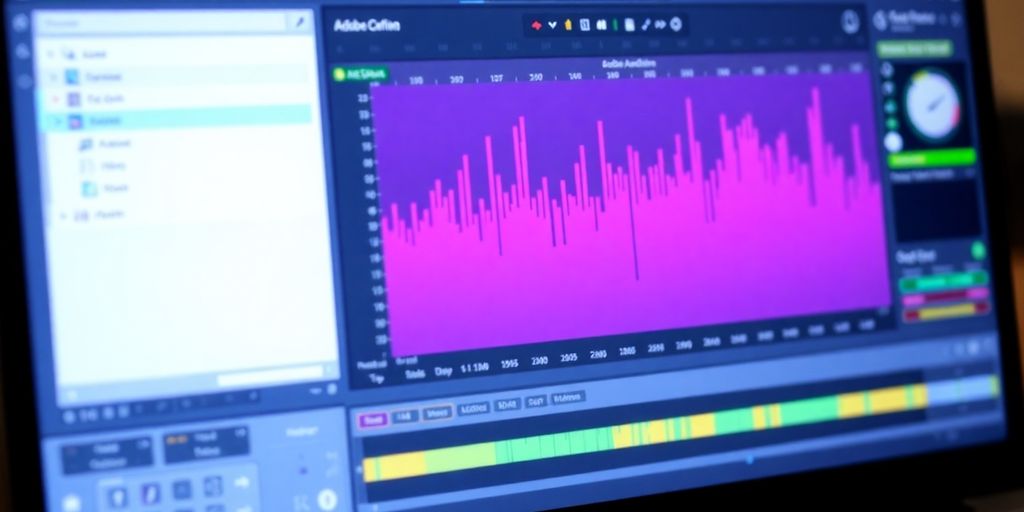
Alright, let’s talk about Adobe Audition. If you’re looking to get serious about your podcast’s sound, this is the big leagues. Think of it as the fancy toolbox that has every single gadget you could ever need, and then some. It’s been around forever, and honestly, it’s still what most pros use. You get super detailed control over everything, from fixing tiny audio glitches to mixing in music and sound effects like a pro.
Audition lets you do both destructive and non-destructive edits, which basically means you can chop things up precisely or make changes that you can undo later without messing up the original audio. It’s got this cool spectral frequency display that lets you see sound, making it easier to zap annoying noises like a persistent hum or a random cough. If you want your podcast to sound like it was recorded in a professional studio, this is where you’ll get that.
This is where Audition really shines for podcasts with multiple speakers or lots of music. You can layer as many audio tracks as you need – think intro music, voiceovers, guest audio, sound effects – and mix them all together. It’s like conducting an orchestra, but with voices and maybe a spooky sound effect for your true-crime show.
Adobe has been packing Audition with AI features, which is pretty neat. You’ve got tools that can automatically reduce background noise, balance loudness with a single click, and even generate transcriptions. This can seriously speed up your workflow, especially when you’re just starting out and trying to get your episodes ready to upload to platforms like Spotify.
So, what’s the downside? Well, Audition isn’t free. You’ll need an Adobe Creative Cloud subscription, which can feel a bit steep if you’re just dipping your toes into podcasting. Also, while it’s powerful, it does have a steeper learning curve than some of the simpler options out there. You might spend a bit of time watching tutorials to get the hang of it, but honestly, the results are usually worth the effort. If you’re already using other Adobe products like Premiere Pro for video, it integrates really smoothly, which is a nice bonus.
If you’re aiming for broadcast-quality sound and are willing to invest a bit of time and money, Adobe Audition is a fantastic choice that will grow with you as your podcasting skills develop.
Alright, let’s talk about Alitu. If the thought of editing audio makes you want to run for the hills, or if you’re just really, really busy, then Alitu might just be your new best friend. Seriously, this thing is designed to take the ‘tech’ out of podcasting. It’s like having a magic wand for your audio, but instead of a wand, it’s a super-intuitive web app. You can record right in it, or upload your existing audio, and Alitu goes to work automatically. It balances your levels, cleans up background noise, and generally makes your audio sound like you actually know what you’re doing. It’s the ultimate ‘set it and forget it’ tool for beginners.
Honestly, if you’re a beginner who wants to get your podcast out there without getting bogged down in technical details, Alitu is a fantastic choice. It’s also great for experienced podcasters who are just strapped for time and want to speed up their workflow. If you’re someone who prefers to have granular control over every single audio setting, you might find it a bit too automated, but for most people starting out, it’s a dream.
Alitu aims to simplify the entire podcast creation process, from recording to publishing, making it accessible even if you have zero technical background. It’s all about getting your voice heard without the usual audio engineering headaches.
Alitu offers a free trial, so you can give it a whirl and see if it fits your podcasting style. You can find out more about how it works on their website.
Alright, let’s talk about Riverside. If you’re looking to record and edit your podcast, especially if you’re dipping your toes into video podcasts, Riverside is a pretty slick option. It’s designed to be super user-friendly, which is a big win when you’re just starting out and don’t want to feel like you need a degree in audio engineering. It’s like having a virtual studio that’s surprisingly affordable, even offering a free plan.
When you record with Riverside, it captures audio locally for everyone involved. This means you get uncompressed WAV audio at 48kHz, which is pretty darn good quality. No more worrying about your internet connection suddenly deciding to take a nap mid-recording and messing up your sound. Plus, it handles separate tracks for each participant, making editing a breeze later on. You can even share your screen and have that recorded on its own track, which is handy if you’re doing a tutorial or showing something off.
Riverside’s editor is where things get interesting for beginners. You can literally delete text from the transcript, and poof! The corresponding audio and video get chopped out too. It’s a massive time-saver, seriously. Need to get rid of all those “ums” and “ahs”? Riverside’s AI Producer can help you zap those filler words and awkward silences with just a click. You can also add music, sound effects, and even create a memorable intro and outro to brand your show. Think of it as your podcast’s sonic handshake, setting the tone right from the start. You can even upload your own tracks or use their royalty-free library. They also let you add video, image, and text overlays, which is fantastic for making your video podcasts more engaging. Want to add a logo or some branded backgrounds? Riverside’s got you covered there too, helping you build that professional look.
This is a cool feature where you can control the show from a backstage view. It’s like being the director of your own podcast, managing everything without being on camera yourself. You can switch between speakers, manage audio levels, and generally keep the show running smoothly. It’s a great way to ensure a polished final product, even if you’re flying solo.
Riverside is browser-based, so you and your guests just need Chrome or Edge. Easy peasy. While seasoned editors might want more advanced tools for fine-tuning, for beginners, it’s a fantastic all-in-one solution. They even have a Magic Clips feature that turns highlights into social media content, which is a nice bonus for getting your podcast out there. You can get started for free, and their premium plans are quite reasonable if you need more features. It’s definitely worth checking out if you want to simplify your podcast production process.
Alright, let’s talk about Hindenburg PRO. If you’re aiming for that documentary-style podcast vibe, this might just be your jam. It used to be called Hindenburg Journalist, and honestly, the name change doesn’t really change its core mission: making audio editing feel less like rocket science and more like telling a story. It’s designed to be less intimidating than some of the super-complex options out there, but don’t let that fool you – it’s still a powerhouse.
This is where Hindenburg PRO really shines. It’s built from the ground up with narrative in mind. You can stitch together multiple audio elements, interviews, and sound effects without needing a degree in audio engineering. It simplifies things like leveling out your audio, reducing background noise, and applying compression. Think of it as having a helpful assistant who knows just how loud each part should be.
While it’s simpler than some professional DAWs, Hindenburg PRO is probably best suited for intermediate to advanced users, or beginners who are serious about producing high-quality, narrative-driven content. If you’re just starting out and want the absolute simplest path, you might look elsewhere, but if you’re ready to invest a bit more time and want professional results, this is a solid contender. It strikes a nice balance between ease of use and powerful features, making it a great choice for crafting compelling audio stories. You can even import video files to edit the audio for them, which is a nice bonus if your podcast has a visual component. If you’re thinking about recording an audiobook, Hindenburg is a tool you should definitely consider for preparing your recording.
Hindenburg PRO offers a perpetual license or various subscription plans, with pricing around $375 for the perpetual license. It’s an investment, for sure, but for the features and the focus on storytelling, many find it worth the cost.
Alright, let’s talk about Filmora. If you’re looking to add a bit of pizzazz to your podcast, especially if it has a video component, this might be your jam. Think of it as the friendly neighborhood video editor that doesn’t require a degree in rocket science to operate. It’s got a bunch of tools that can make your podcast look and sound more professional, even if your editing skills are currently somewhere between “can barely turn on a computer” and “accidentally deleted my own files.”
Filmora is pretty much a one-stop shop for making your podcast shine. You get tools for editing video, audio, and even photos, which is handy if you’re trying to market your podcast on social media. It’s like getting a whole toolbox instead of just a single screwdriver. You can throw in sound effects, some catchy music, maybe some animated titles, and even create some cool cover art that actually looks like it belongs to a real podcast. It’s designed to be beginner-friendly, so you won’t be pulling your hair out trying to figure out where to start.
Filmora runs on Windows, which is good to know if you’re not a Mac person. It’s got some pretty solid ratings from places like Creative Bloq and PCMag, so it’s not just me saying it’s good. The best part? You can actually start using it for free. If you decide you’re hooked and want more features, there’s a premium subscription for about $8.33 a month. It’s a pretty sweet deal for what you get.

Alright, let’s talk about Veed.io. If you’re dabbling in video podcasts, which, let’s be honest, is becoming the norm, then Veed is your new best friend. Its superpower? Generating subtitles. Seriously, this thing can whip up subtitles from your audio or video in mere minutes with, like, 98% accuracy. It even highlights words the AI might have messed up, so you can do a quick once-over. Plus, you can tweak those subtitles and even translate them into over 50 languages. Pretty neat for reaching a wider audience, right?
Beyond the subtitle magic, Veed is a pretty versatile tool. You can record and edit your podcast, stream to different platforms, and even share your screen. It’s designed to be beginner-friendly, which is great, but be warned: the price tag can sneak up on you. The free version is a bit limited, only letting you export videos up to 25 minutes. If your podcast episodes are longer than that, you’ll need to cough up for the Pro version, and it’s priced like professional software. So, while it’s a solid all-in-one option, especially for getting those captions sorted, make sure you check the pricing tiers before you commit.
Here’s a quick rundown:
Veed is a fantastic option if your main goal is to add subtitles to your video podcasts. It makes a tedious job incredibly simple. Just be mindful of the subscription costs if you need longer export times or more advanced features.
Alright, let’s talk about Camtasia. If you’re dipping your toes into the podcasting world and also happen to be dabbling in video, this might just be your new best friend. Think of it as a video editor that decided to get really good at audio too. It’s not just for fancy movie trailers; it’s surprisingly capable for making your podcast sound as good as it looks.
Camtasia is basically a one-stop shop for screen recording and video editing. You can capture your screen, record your webcam, and then edit it all together with relative ease. For podcasters who are also creating video content, this means you can record your interviews, edit out those awkward pauses or “ums,” and add some visual flair, all within the same program. It’s pretty slick.
Camtasia isn’t free, which is a bit of a bummer when you’re just starting out. However, you get a lot for your money. It’s a powerful tool that combines screen recording, video editing, and decent audio editing into one package. If you’re serious about video podcasts and want a tool that’s relatively easy to learn but still offers a good amount of control, it’s definitely worth considering. Plus, you can often find deals or bundles that make it more accessible. Remember, good audio is key, so don’t skimp on your microphone setup; check out some beginner microphone tips to get started.
Camtasia really shines when you need to integrate screen recordings or visual elements directly into your podcast workflow. It simplifies the process significantly, allowing you to focus on content rather than wrestling with multiple complex software programs.
Alright, let’s talk about Streamyard. If you’re looking to do more than just audio, maybe dip your toes into video podcasting or even live streaming, this is a tool you’ll want to know about. Think of it as your all-in-one studio, but, you know, without the actual studio. It’s pretty slick for getting your show out there live, letting you manage guests, add graphics, and generally make things look more professional than just staring at your own face.
Streamyard really shines when you’re going live. You can easily bring guests into your broadcast, switch up camera angles, and even add your show’s logo or lower thirds to make it look polished. It’s like having a virtual control room right at your fingertips. Plus, you can stream to multiple platforms at once, which is a huge time-saver if you’re trying to reach a wider audience. It’s a solid option for anyone wanting to broadcast their podcast live.
Don’t let the fancy features scare you. Streamyard is designed to be pretty straightforward. You don’t need to be a tech wizard to figure it out. Most of the controls are intuitive, and you can get a broadcast up and running without a ton of hassle. It’s a good way to start experimenting with video or live content without a steep learning curve.
While Streamyard is fantastic for live video and broadcasting, remember that its editing capabilities are pretty basic. You’ll likely want to pair it with a dedicated audio editor for fine-tuning your sound after the fact. Think of it as your broadcast director, not your audio engineer.
Streamyard offers a free plan to get you started, which is awesome. If you need more features, like higher resolution or more branding options, their paid plans are quite reasonable. It’s a great tool to consider if you’re looking to expand your podcast’s reach beyond just audio. You can even use it to record your episodes if you’re doing video, though for serious audio editing, you might want to look at other options. Managing your podcast’s distribution is also important, and a good podcast host can make that much simpler.
Alright, let’s talk about Squadcast. If you’re looking to record high-quality audio with your co-hosts or guests, especially if they’re not in the same room as you, Squadcast is a solid contender. Think of it as your remote recording buddy that actually knows what it’s doing. It’s designed to capture everyone’s audio locally, which means even if your internet connection decides to take a nap, your audio is safe and sound. No more choppy, dropped audio because someone’s Wi-Fi is acting up! It’s pretty straightforward to use, which is a big win when you’re just starting out and don’t want to wrestle with complicated software. You just invite your guests, hit record, and it handles the heavy lifting of getting clean audio tracks for everyone.
Squadcast really shines here. It records in uncompressed WAV format, which is like giving your audio the red carpet treatment. This means you get super clean, high-fidelity sound that’s a dream to edit later. You can even record up to 48kHz, which is pretty professional for a tool that’s relatively easy to get the hang of.
Seriously, it’s not rocket science. You create a session, send out invites, and everyone joins through their browser. No downloads needed for your guests, which is always a plus. The interface is clean, and you can see who’s connected and recording. It’s designed to be intuitive, so you can focus on the conversation, not on fiddling with settings.
While Squadcast is fantastic for recording, you might find yourself wanting more advanced editing features down the line. For that, you might need to pair it with a dedicated editing program. But for getting the raw, high-quality material, it’s a winner.
Squadcast offers different pricing tiers, but they do have a free trial so you can test the waters. If you’re serious about getting good remote audio, it’s definitely worth checking out. It’s a tool that helps you sound professional without needing a degree in audio engineering. You can even check out other remote recording options like Zencastr if you want to compare.
Check out the Squadcast for laughs and insights on faith and culture. It’s a really funny show that talks about important stuff in a cool way. Want to hear more? Visit our website to catch up on all the episodes and learn about what matters.
Alright, so now you’ve seen all the cool stuff you can do with podcast editing. Whether you’re going the free route with Audacity and ready to learn a bit, or you’re eyeing something like Alitu for pure ease, or even diving into the big leagues with Adobe Audition, you’ve got options. Don’t let the tech scare you off. Pick a tool that feels right for your brain and your wallet, mess around with it, and remember that even the pros started somewhere. Your listeners are waiting for your awesome voice, so go ahead and make some noise (the good kind, hopefully!). Happy editing!
Think about how much cash you’re willing to spend. Some tools are free, while others cost money. Also, consider how much you already know about editing. Some programs are super simple for beginners, and others are more complex for people who have been editing for a while. Lastly, think about what you really need the software to do. Do you want it to help with recording too, or just editing? Matching the tool to what you need is key.
Yes, many podcast editing tools can also record your audio. This is great because it means you can use just one program for both recording and editing. However, if you’re interviewing people who aren’t in the same room as you, you might need separate software to record those remote calls, unless your editing software has that feature built-in.
The easiest way is to use software that has automatic editing features, often powered by AI. These tools can automatically remove mistakes, adjust sound levels, and even add music. If you want more control, you can manually edit by cutting out parts you don’t want and arranging the audio yourself. For the absolute best quality with no effort, you could hire someone to edit it for you, but that costs more.
You can definitely use regular audio editing software, but there are now programs made just for podcasts. These often have special tools that make editing podcasts much easier. Think of it like using a tool made for a specific job instead of a general tool – it’s usually faster and better.
Yes, many editing programs offer features to improve your sound. You can remove background noise, make sure everyone’s voice is at the same volume, and fix sounds that are too sharp or harsh. Some software even has AI tools that can do this for you with just a click.
It really depends on what you need. Audacity is a great free choice if you’re just starting and don’t want to spend money, but it can look a bit old-fashioned and confusing at first. Adobe Audition is very powerful and professional but costs money and has a steeper learning curve. Tools like Alitu are made to be super simple and quick for podcasters. Riverside is good because it lets you record, edit, and share all in one place, with helpful AI features.
